WebSocket Authentication
Apache APISIX supports WebSocket traffic, but the WebSocket protocol doesn't handle authentication. This article guides you on how to configure authentication for WebSocket connections using Apache APISIX.
WebSocket Protocol#
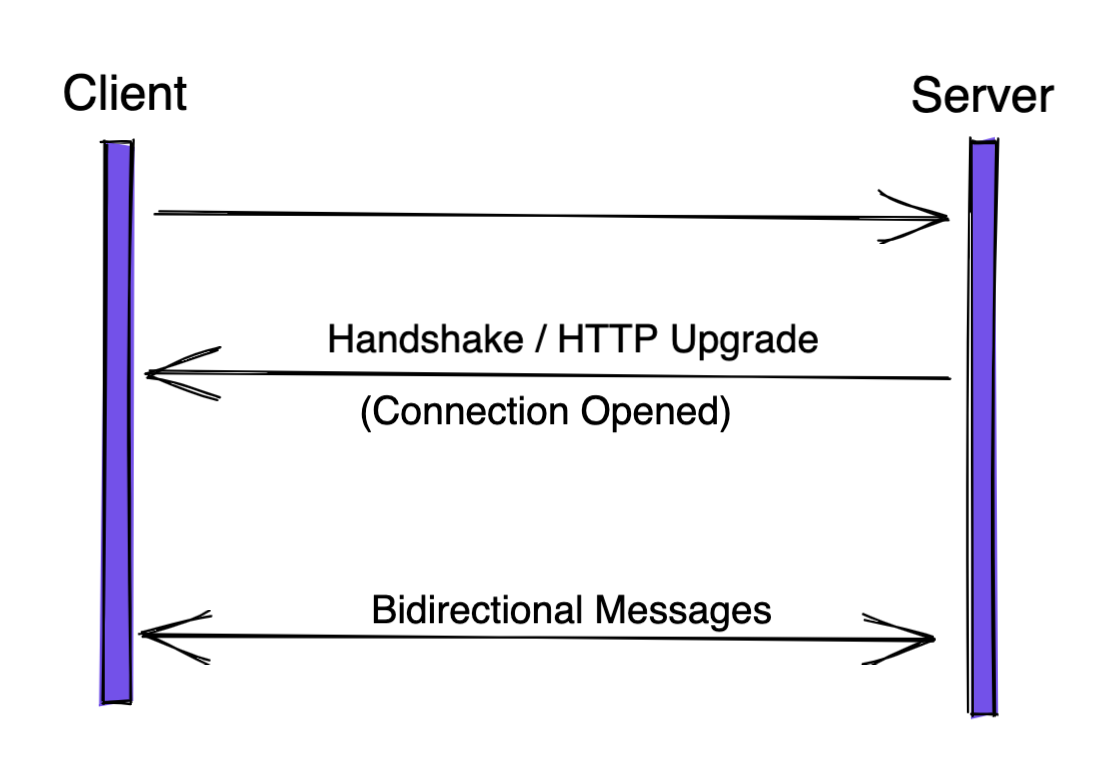
To establish a WebSocket connection, the client sends a WebSocket handshake request, for which the server returns a WebSocket handshake response as shown below:
GET /chat HTTP/1.1
Host: server.example.com
Upgrade: websocket
Connection: Upgrade
Sec-WebSocket-Key: x3JJHMbDL1EzLkh9GBhXDw==
Sec-WebSocket-Protocol: chat, superchat
Sec-WebSocket-Version: 13
Origin: http://example.com
HTTP/1.1 101 Switching Protocols
Upgrade: websocket
Connection: Upgrade
Sec-WebSocket-Accept: HSmrc0sMlYUkAGmm5OPpG2HaGWk=
Sec-WebSocket-Protocol: chat
The handshake workflow is shown below:
WebSocket Authentication#
APISIX supports several authentication methods like basic-auth, key-auth, and jwt-auth.
While establishing connections from the client to server in the handshake phase, APISIX first checks its authentication information before choosing to forward the request or deny it.
Prerequisites#
Before you move on, make sure you have:
- A WebSocket server as the Upstream. This article uses Postman's public echo service:
wss://ws.postman-echo.com/raw. - APISIX 3.0 installed.
Configuring Authentication#
Create a Route#
First we will create a Route to the Upstream echo service.
Since the Upstream uses wss protocol, the scheme is set to https. We should also set enable_websocket to true.
In this tutorial, we will use the key-auth Plugin. This would work similarly for other authentication methods:
curl --location --request PUT 'http://127.0.0.1:9180/apisix/admin/routes/1' \
--header 'X-API-KEY: edd1c9f034335f136f87ad84b625c8f1' \
--header 'Content-Type: application/json' \
--data-raw '{
    "uri": "/*",
    "methods": ["GET"],
    "enable_websocket": true,
    "upstream": {
        "type": "roundrobin",
        "nodes": {
            "ws.postman-echo.com:443": 1
        },
        "scheme": "https"
    },
    "plugins": {
        "key-auth": {}
    }
}'
Create a Consumer#
We will now create a Consumer and add a key this_is_the_key. A user would now need to use this key configured in the Consumer object to access the API.
curl --location --request PUT 'http://127.0.0.1:9180/apisix/admin/consumers/jack' \
--header 'X-API-KEY: edd1c9f034335f136f87ad84b625c8f1' \
--header 'Content-Type: application/json' \
--data-raw '{
    "username": "jack",
    "plugins": {
        "key-auth": {
            "key": "this_is_the_key"
        }
    }
}'
Testing the Route#
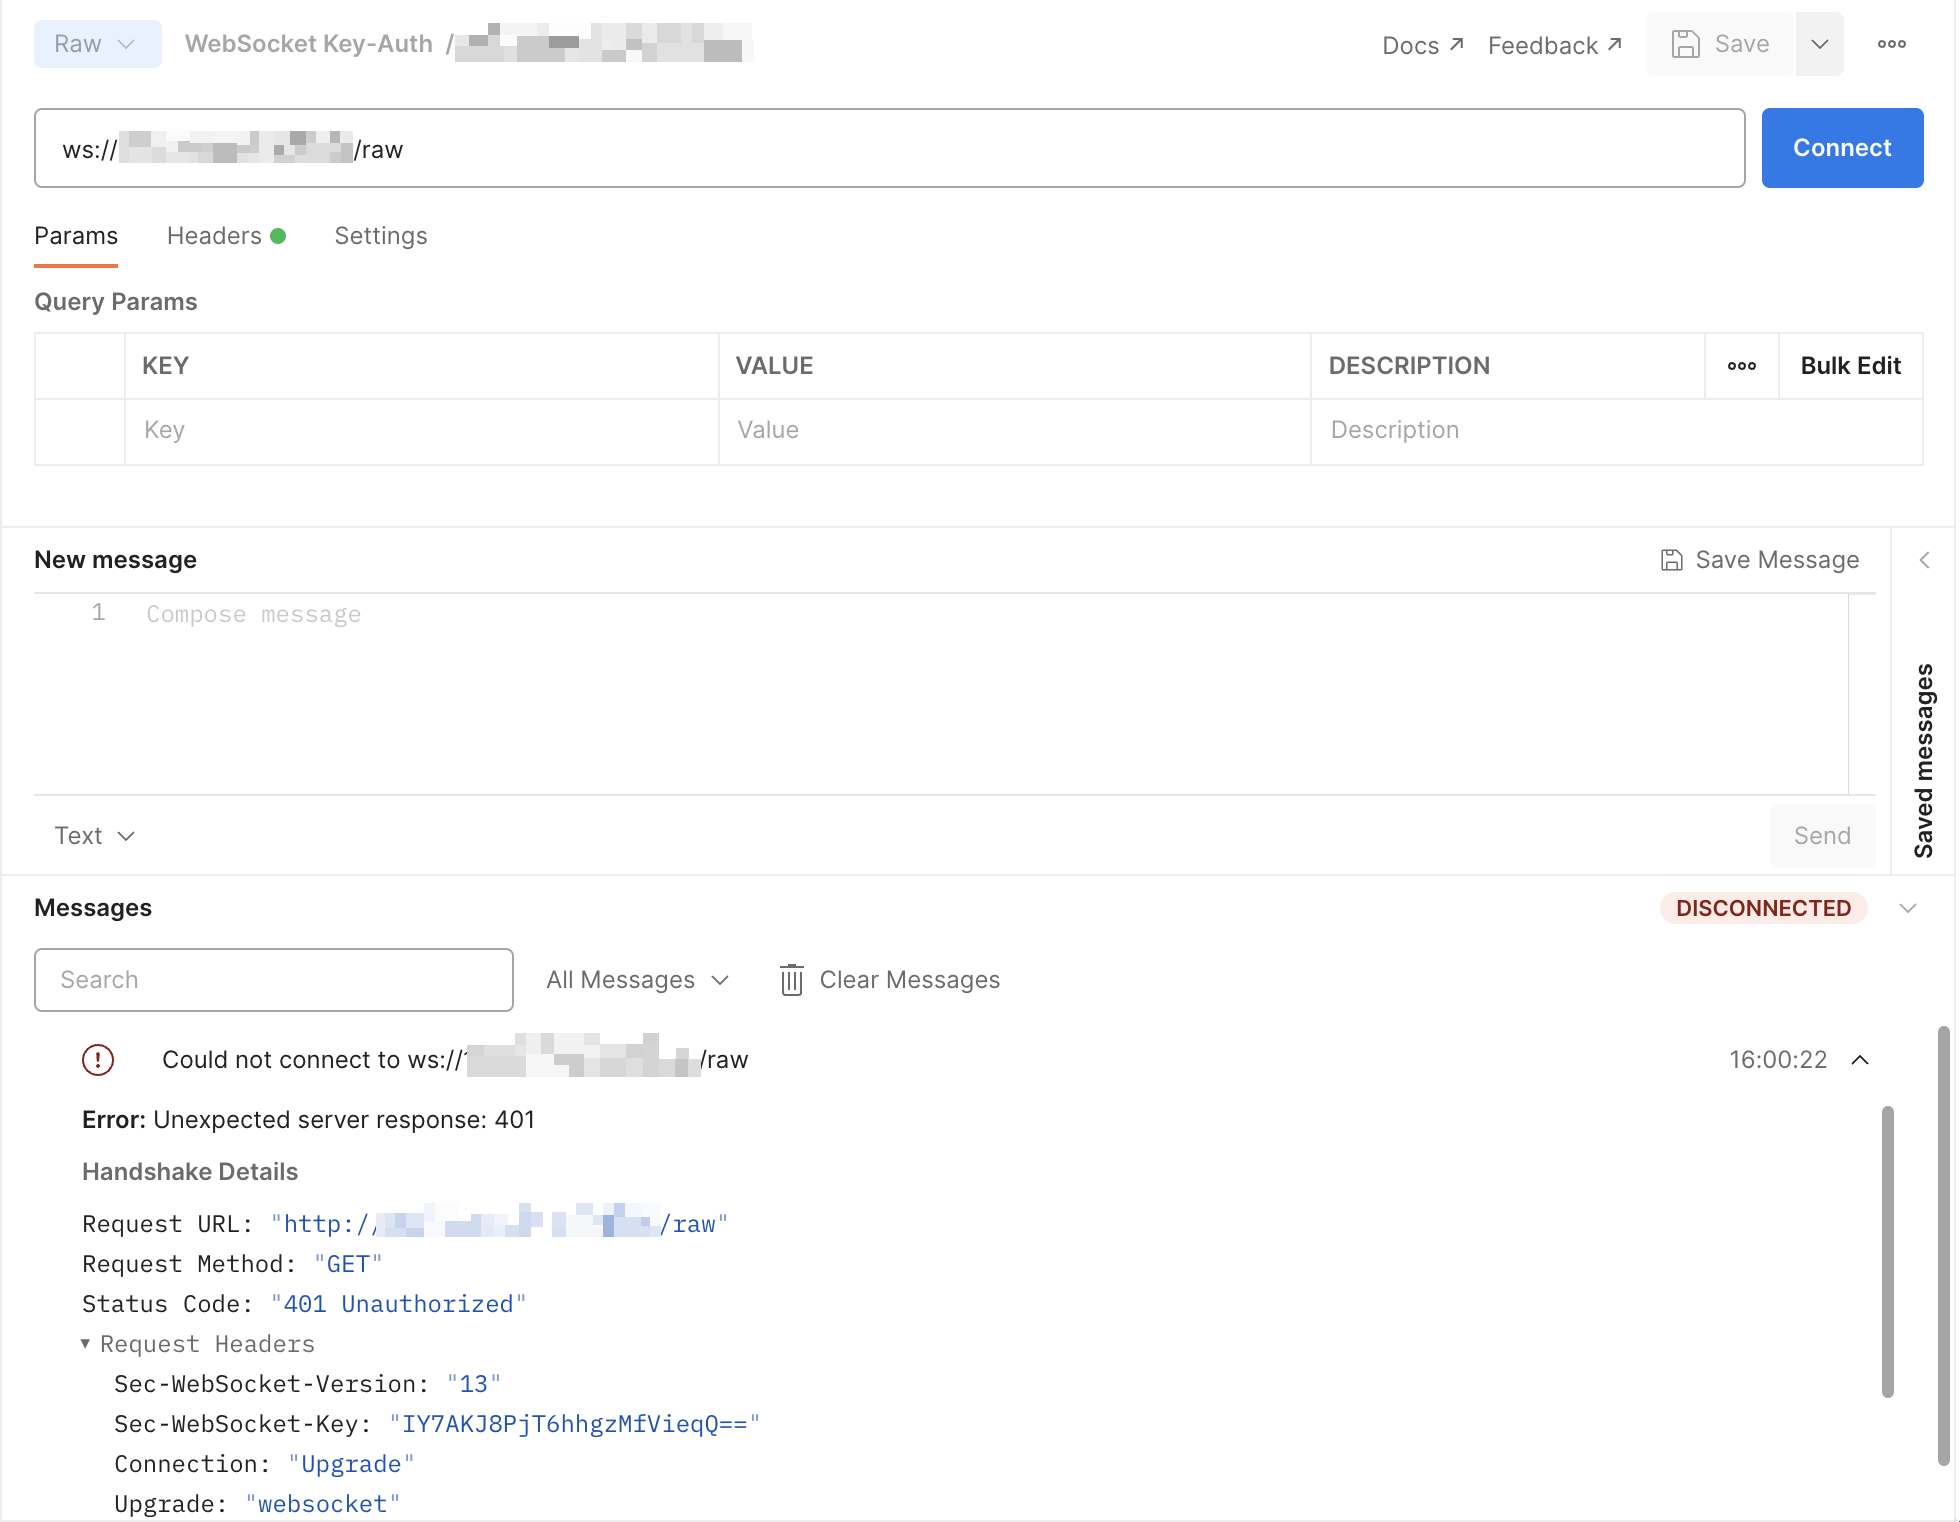
Now, if you try to connect ws://127.0.0.1:9080/raw without the apikey header or an incorrect key, APISIX will return a 401 Unauthorized.
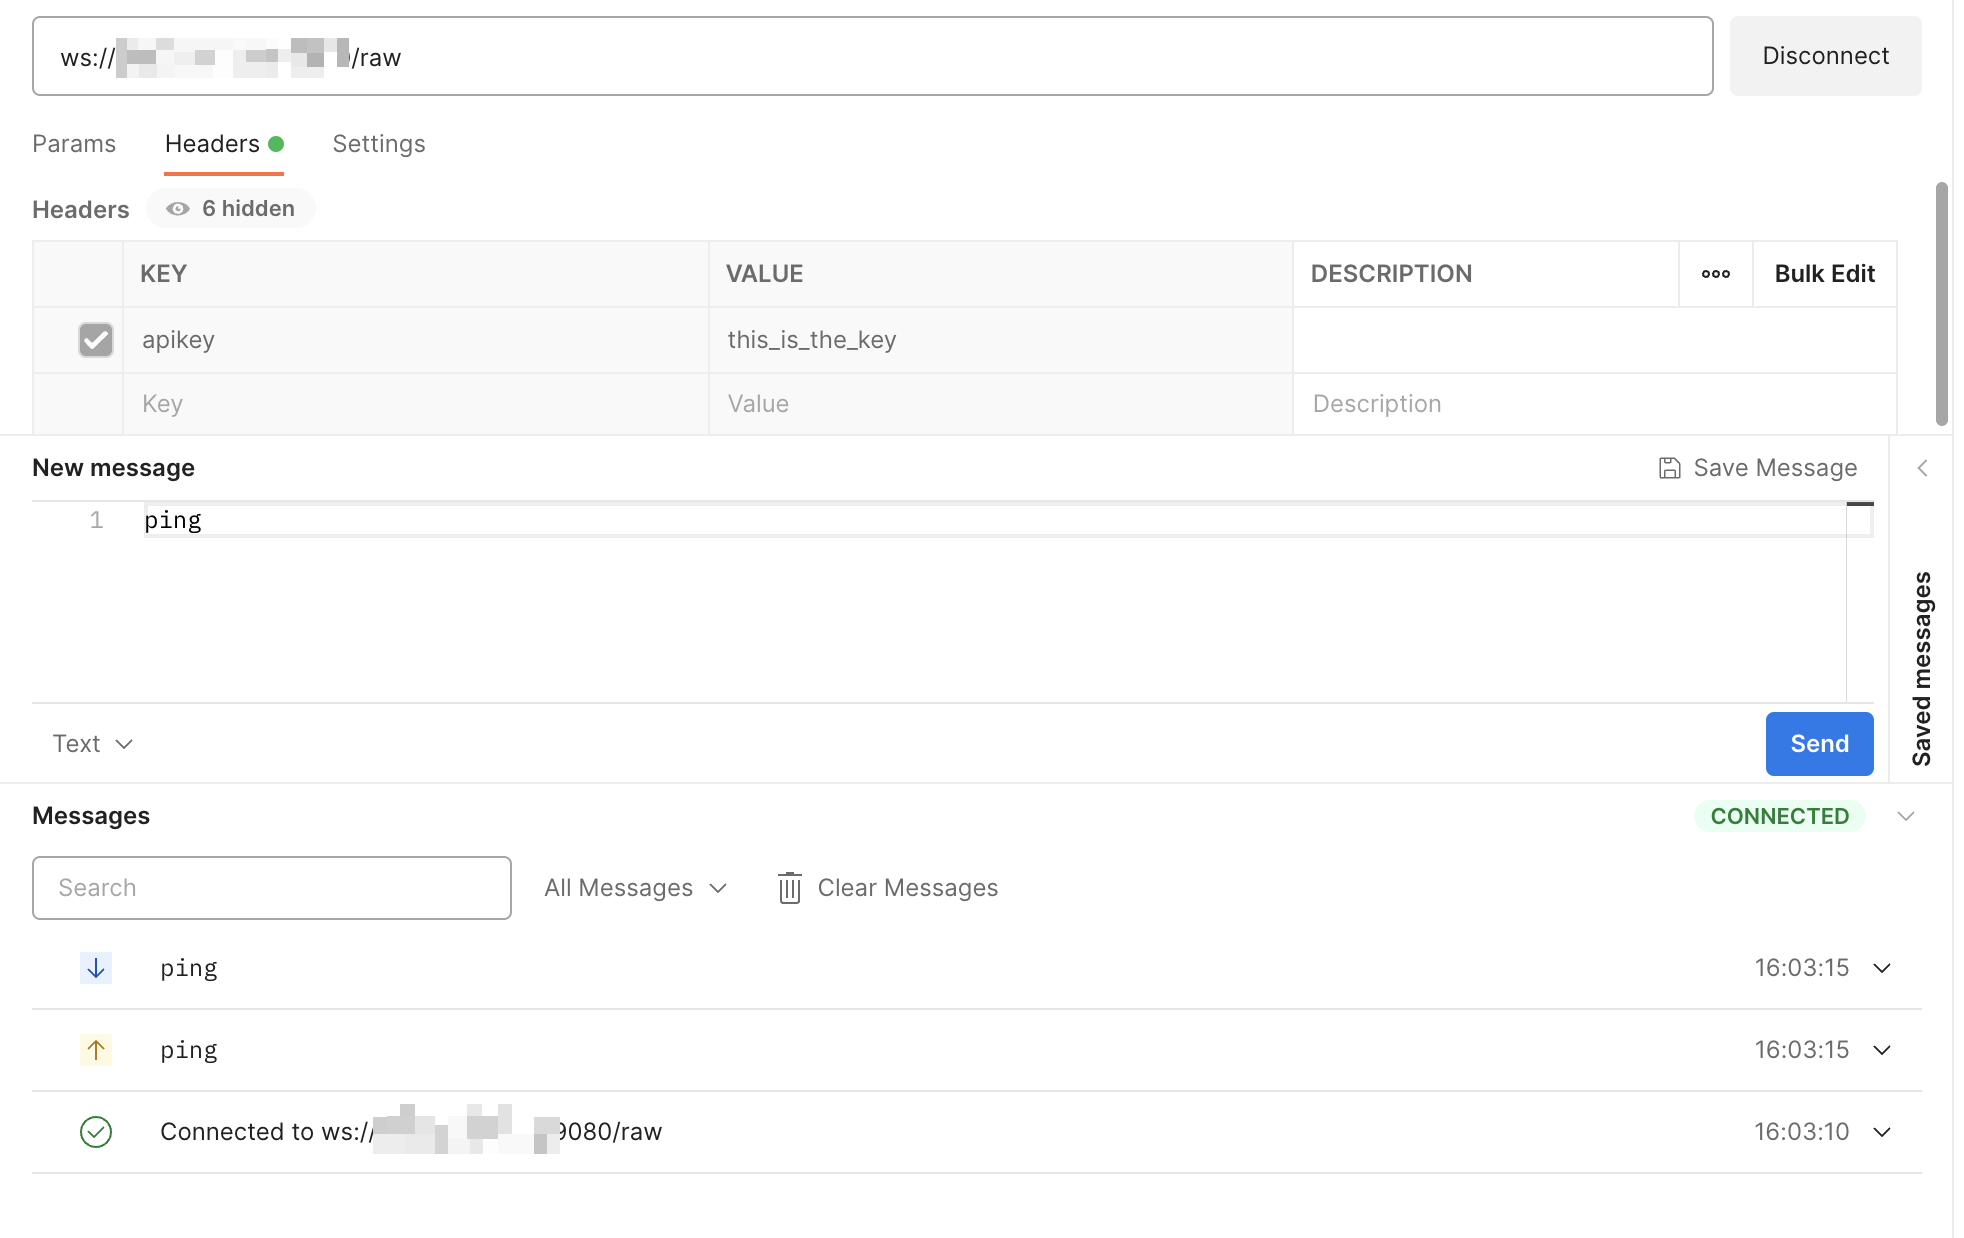
To authenticate, you can add the header apikey with the value this_is_the_key: