

This article describes how Apache APISIX integrates with Ory Hydra to implement centralized authentication.
Background Information
Apache APISIX
Apache APISIX is an open source cloud native API gateway. As an API gateway, it has the characteristics of dynamic, real-time, and high performance. It provides rich traffic management functions such as load balancing, dynamic upstream, gray-scale publishing, service fusing, identity authentication and observability. You can use APISIX to handle the traditional north-south traffic and the east-west traffic between services. It can also be used as a K8s ingress controller. Thanks to the full dynamic design of APISIX, configuration changes can be made at any time without restarting the service.
The openid-connect plugin of APISIX supports the OpenID Connect protocol. Users can use this plugin to allow Apache APISIX to connect with many authentication service providers and deploy it in enterprises as a centralized authentication gateway.
ORY Hydra
Ory Hydra is one of the identity providers that supports the OAuth 2.0 and OpenID Connect protocols, based on the OAuth 2.0 authorization framework and the Open ID Connect Core 1.0 framework, with both open source and cloud native features. It can be integrated with any login system, and through OAuth 2.0 Access, Refresh, and ID Tokens, third parties can easily access your API, enabling users to interact with any application anytime, anywhere.
Ory Hydra is written in Go language and provides SDKs for almost all languages, including Dart, .NET, Go, Java, PHP, Python, Ruby, Rust, and Typescript. It works with any login system, and the login experience can be easily customized.
Introduction
OpenID is a centralized authentication mode, and it is a decentralized identity authentication system. The advantage of using OpenID is that users only need to register and log in on one OpenID identity provider's website and use one account and password information to access different applications.
With the openid-connect plugin supported by APISIX, we can integrate with authenticators supporting the OpenID Connect protocol. For example: Ory Hydra. For more information, please refer to: Centralized Identity Authentication.
One of the biggest advantages of Ory Hydra is that it implements the OAuth and OpenID Connect standards instead of forcing you to use "Hydra user management" (login, logout, profile management, registration), a specific template engine, or a predefined front end.
It allows to use the authentication mechanisms required by your program (token-based 2FA, SMS 2FA, etc.) and implement user management and login in your technology stack. Of course, you can also use existing solutions, such as authboss. It gives you all the great features of OAuth 2.0 and OpenID Connect while being minimally intrusive to your business logic and technology stack.
OAuth 2.0 can be used in many environments for various purposes. The following information may help you decide whether OAuth 2.0 and Hydra are suitable for a certain scenario:
- enable third-party solutions to access your APIs.
- be an Identity Provider like Google, Facebook, or Microsoft.
- enable your browser, mobile, or wearable applications to access your APIs: Running an OAuth2 Provider can work great for this. You don't have to store passwords on the device and can revoke access tokens at any time.
- you want to limit what type of information your backend services can read from each other. For example, the comment service should only be allowed to fetch user profile updates but shouldn't be able to read user passwords.
Operation steps
Next, I will show you how APISIX integrates with Hydra using a real example. In this example, Docker will be used to running the required environment. Please install Docker before doing this.
Step 1: Create and deploy the database
For quick deployment of the test environment, we will use Docker to run PostgreSQL as Hydra's database. It's not recommended to use Docker to run the database in production.
docker network create hydraguide && \
docker run \
  --network hydraguide \
  --name ory-hydra-example--postgres \
  -e POSTGRES_USER=hydra \
  -e POSTGRES_PASSWORD=secret \
  -e POSTGRES_DB=hydra \
  -d postgres:9.6
The above command will create a network named hydraguide and start a Postgres instance named ory-hydra-example--postgres which creates the database hydra, the user hydra, and the user password secret.
Step 2: Deploy Hydra
This step will map 4444 to 5444 and 4445 to 5445 ports, please make sure that these ports are not used.
- The system key can only be set for the new database, and does not support key rotation. This key is used to encrypt the database and needs to be set to the same value each time the process restarts. You can use
/dev/urandomto generate keys. But make sure that the key must be the same when you define it. For example, you can store the value somewhere:
export SECRETS_SYSTEM=$(export LC_CTYPE=C; cat /dev/urandom | tr -dc 'a-zA-Z0-9' | fold -w 32 | head -n 1)
Set Hydra's database URL to point to your Postgres instance by configuring an environment variable.
export DSN=postgres://hydra:secret@ory-hydra-example--postgres:5432/hydra?sslmode=disable
- Ory Hydra does not migrate SQL automatically, so you need to manually perform the database migration.
docker pull oryd/hydra:v1.10.6 && \
docker run -it --rm \
  --network hydraguide \
  oryd/hydra:v1.10.6 \
  migrate sql --yes $DSN
- Run the Hydra server with the following command. For more information, please refer to deploy-ory-hydra.
docker run -d \
  --name ory-hydra-example--hydra \
  --network hydraguide \
  -p 5444:4444 \
  -p 5445:4445 \
  -e SECRETS_SYSTEM=$SECRETS_SYSTEM \
  -e DSN=$DSN \
  -e URLS_SELF_ISSUER=https://localhost:5444/ \
  -e URLS_CONSENT=http://localhost:9020/consent \
  -e URLS_LOGIN=http://localhost:9020/login \
  oryd/hydra:v1.10.6 serve all
You can view Hydra logs using the following command:
docker logs ory-hydra-example--hydra
note
If the Hydra password is not specified, you can find the password information in the log. If you forget your password, you will not be able to restart Hydra.
You can also use the following commands to view Hydra related introductions and operation commands.
docker run -it --rm --entrypoint hydra oryd/hydra:v1.10.6 help serve
Step 3: Deploy login and authentication programs
Login Provider and Consent Provider can be two separate web services. Hydra provides sample programs that combine both functions in one application. Next, we'll deploy the application using Docker.
docker pull oryd/hydra-login-consent-node:v1.10.6 && \
docker run -d \
  --name ory-hydra-example--consent \
  -p 9020:3000 \
  --network hydraguide \
  -e HYDRA_ADMIN_URL=https://ory-hydra-example--hydra:4445 \
  -e NODE_TLS_REJECT_UNAUTHORIZED=0 \
  oryd/hydra-login-consent-node:v1.10.6
You can use the following command to check whether the program runs normally:
docker logs ory-hydra-example--consent
Returns the result normally:
> hydra-login-consent-logout@0.0.0 serve /usr/src/app
> node lib/app.js

Listening on http://0.0.0.0:3000
Step 4: Execute the OAuth 2.0 Authorization Code Flow
Hydra supports the ability to set an OAuth 2.0 consumer and OAuth 2.0 callback URL via the CLI, and is a third-party application that requests access to user resources on the server.
This information is required when configuring the APISIX openid-connect plugin:
idcorresponds to theclient_idconfigure by the plugin in the following route.secretcorresponds to theclient_secretconfigured by the plugin in the following route.scopecorresponds to thescopeconfigured by the plugin in the following route.
docker run --rm -it \
  -e HYDRA_ADMIN_URL=https://ory-hydra-example--hydra:4445 \
  -- network hydraguide \
  oryd/hydra:v1.10.6 \
  clients create --skip-tls-verify \
    --id facebook-photo-backup \
    --secret some-secret \
    --grant-types authorization_code,refresh_token,client_credentials,implicit \
    --response-types token,code,id_token \
    --scope openid,offline,photos.read \
    --callbacks http://127.0.0.1:9010/callback
The following example will perform an OAuth 2.0 authorization flow. To simplify this, the Hydra CLI provides a helper command called hydra token user.
 docker run --rm -it \
  --network hydraguide \
  -p 9010:9010 \
  oryd/hydra:v1.10.6 \
  token user --skip-tls-verify \
    --port 9010 \
    --auth-url https://localhost:5444/oauth2/auth \
    --token-url https://localhost:5444/oauth2/token \
    --client-id facebook-photo-backup \
    --client-secret some-secret \
    --scope openid,offline,photos.read
If the returned result is as follows, the configuration is normal:
Setting up home route on http://127.0.0.1:9010/
Setting up callback listener on http://127.0.0.1:9010/callback
Press ctrl + c on Linux / Windows or cmd + c on OSX to end the process.
If your browser doesn't open automatically, navigate to:

        http://127.0.0.1:9010/
This step will start a user login program, we will use this program in the next step.
Step 5: Start APISIX and configure routing
If you do not have APISIX installed, please refer to: Installation.
Once installed, just create routes and configure openid-connect plugin. In order to verify the effect more intuitively, we also need to start an NGINX service as upstream, you can also use existing upstream services.
note
APISIX in this example is installed on the host. If it is started with Docker, there may be network problems.
- First create an NGINX upstream using Docker.
docker run -d --name test-nginx -p 8081:80 nginx
- Create a route and configure the
openid-connectplugin with the following commands.
client_id, client_secret and scope are the IDs set in step four. You can refer to Preparing for Production for additional information. From the above link, we can see that the address of discovery is https://{IP:Port}/.well-known/openid-configuration.
curl http://127.0.0.1:9080/apisix/admin/routes/1 \
-H 'X-API-KEY: edd1c9f034335f136f87ad84b625c8f1' -X PUT -d '
{
    "uri":"/*",
    "plugins":{
        "openid-connect":{
            "client_id":"facebook-photo-backup",
            "client_secret":"some-secret",
            "discovery":"https://127.0.0.1:5444/.well-known/openid-configuration",
            "scope":"openid",
            "token_endpoint_auth_method": "client_secret_basic",
            "bearer_only": false,
            "redirect_uri":"http://127.0.0.1:9080/callback"
        }
    },
    "upstream":{
        "type":"roundrobin",
        "nodes":{
            "127.0.0.1:8081":1
        }
    }
}'
Step 6: Visit the webpage
Enter
http://127.0.0.1:9080/index.htmlin the browser. Since theopenid-connectplugin has been enabled, the page is redirected to the login page, enter the default account password into the user authentication program.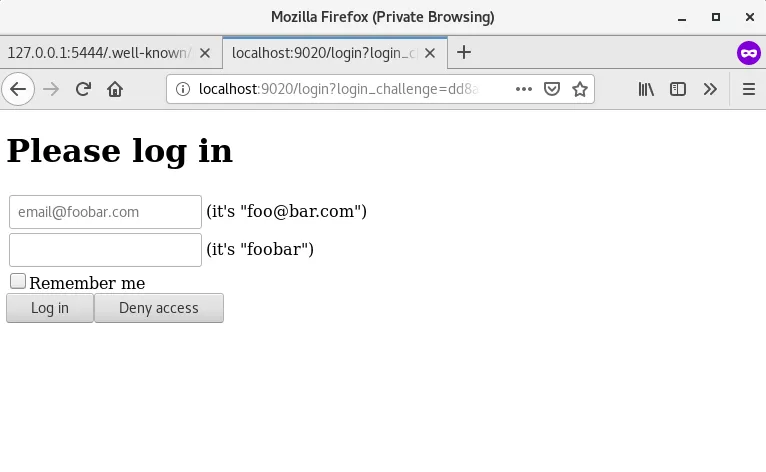 Click to Preview
Select the authentication protocol and click
Allow Access. Click to Preview
After successful verification, you can access the upstream service page.
 Click to Preview


Summary
This article mainly introduces how Hydra integrates with APISIX and the application scenarios of Hydra. You only need to install Hydra related programs on the server, and you can use it directly as your authentication program.